ChromeのColorPickerを実装した
TODO: gif, refactor, github
         // https://gist.github.com/mjackson/5311256
        class Picker {
            constructor() {
                this.view = {
                    canvas: document.getElementById('canvas'),
                    colorPanel: document.getElementById('colorPanel'),
                    dummyPalette: document.getElementById('dummyPalette'),
                    paletteThumb: document.getElementById('paletteThumb'),
                    dummySlider: document.getElementById('dummySlider'),
                    sliderThumb: document.getElementById('sliderThumb'),
                    hexInput: document.getElementById('hex-input'),
                }

                this.colorUtil = {
                    rgbToHsv: (r, g, b) => {
                        r /= 255, g /= 255, b /= 255;
                        let max = Math.max(r, g, b), min = Math.min(r, g, b);
                        let h, s, v = max;
                        let d = max - min;
                        s = max == 0 ? 0 : d / max;
                        if (max === min) {
                            h = 0; // achromatic
                        } else {
                            switch (max) {
                                case r: h = (g - b) / d + (g < b ? 6 : 0); break;
                                case g: h = (b - r) / d + 2; break;
                                case b: h = (r - g) / d + 4; break;
                            }
                            h /= 6;
                        }
                        return [ h, s, v ];
                    },
                    hsvToRgb: (h, s, v) => {
                        let r, g, b;
                        let i = Math.floor(h * 6);
                        let f = h * 6 - i;
                        let p = v * (1 - s);
                        let q = v * (1 - f * s);
                        let t = v * (1 - (1 - f) * s);

                        switch (i % 6) {
                            case 0: r = v, g = t, b = p; break;
                            case 1: r = q, g = v, b = p; break;
                            case 2: r = p, g = v, b = t; break;
                            case 3: r = p, g = q, b = v; break;
                            case 4: r = t, g = p, b = v; break;
                            case 5: r = v, g = p, b = q; break;
                            default: break;
                        }

                        return { r: r * 255, g: g * 255, b: b * 255 };
                    },
                    hexToRgb: (hex) => {
                        if (hex.length !== 6) { return }
                        const rgb = [hex.slice(0, 2), hex.slice(2, 4), hex.slice(4, 6)]
                        .map(str => parseInt(str, 16 ))
                        if (rgb.includes(NaN)) {
                            return
                        }
                        return rgb
                    },
                }

                this.state = new Proxy({hue: 0, brightness: 1, saturation: 1}, {
                    set: (obj, prop, value) => {
                        if (prop === 'hue') {
                            this.didSetHue(value);
                            this.updateView();
                        }
                        obj[prop] = value;
                        if (prop === 'brightness') {
                            this.updateView()
                        }
                        return true;
                    }
                })

                this.handleSlider();
                this.handleColorPalette();
                this.handleHexInput();
                this.didSetHue(0)
                this.updateView()
            }


            drawGradient(fillColor) {
                const { canvas } = this.view;
                const context = canvas.getContext('2d');
                const rect = { x: 0, y: 0, width: canvas.clientWidth, height: canvas.clientHeight };

                const whiteGradation = context.createLinearGradient(0, 0, rect.width, 0);
                whiteGradation.addColorStop(0, 'rgba(255, 255, 255 ,1)');
                whiteGradation.addColorStop(1, 'rgba(255, 255, 255, 0)');

                const blackGradation = context.createLinearGradient(0, 0, 0, rect.height);
                blackGradation.addColorStop(0, 'rgba(0, 0, 0, 0)');
                blackGradation.addColorStop(1, 'rgba(0, 0, 0, 1)');

                [fillColor, whiteGradation, blackGradation].forEach(fillColor => {
                    context.fillStyle = fillColor;
                    context.fillRect(rect.x, rect.y, rect.width, rect.height);
                })
            }

            handleSlider() {
                const { dummySlider, sliderThumb } = this.view;
                let isSliderDragging = false;
                dummySlider.addEventListener('mousemove', (e) => {
                    if (!isSliderDragging) { return }
                    sliderThumb.style.left = `${e.offsetX - sliderThumb.clientWidth / 2}px`;
                    this.state.hue = e.offsetX / e.toElement.clientWidth;
                })
                dummySlider.addEventListener('mousedown', (e) => isSliderDragging = true);
                dummySlider.addEventListener('mouseup', (e) => isSliderDragging = false);

                dummySlider.addEventListener('touchmove', (e) => {
                    e.preventDefault()
                    if (!isSliderDragging) { return }
                    sliderThumb.style.left = `${e.changedTouches[0].pageX - sliderThumb.clientWidth / 2}px`;
                    this.state.hue = e.changedTouches[0].pageX / e.toElement.clientWidth;
                })
                dummySlider.addEventListener('touchstart', (e) => isSliderDragging = true);
                dummySlider.addEventListener('touchend', (e) => isSliderDragging = false);
            }

            handleColorPalette() {
                const { dummyPalette, paletteThumb } = this.view;
                let isPaletteDragging = false;
                dummyPalette.addEventListener('mousemove', (e) => {
                    console.log(0)
                    if (!isPaletteDragging) { return }
                    paletteThumb.style.left = `${e.offsetX - paletteThumb.clientWidth / 2}px`;
                    paletteThumb.style.top = `${e.offsetY - paletteThumb.clientHeight / 2}px`;
                    this.state.saturation = e.offsetX / e.toElement.clientWidth;
                    this.state.brightness = 1 - e.offsetY / e.toElement.clientHeight;
                })

                dummyPalette.addEventListener('mousedown', () => isPaletteDragging = true)
                dummyPalette.addEventListener('mouseup', () => isPaletteDragging = false);
            }

            handleHexInput() {
                const { hexInput } = this.view;
                hexInput.addEventListener('input', (e) => {
                    const rgb = this.colorUtil.hexToRgb(e.target.value.slice(1));
                    if(rgb) {
                        const hsv = this.colorUtil.rgbToHsv(rgb[0], rgb[1], rgb[2]);
                        this.state.saturation = hsv[1]
                        this.state.brightness = hsv[2]
                        this.state.hue = hsv[0]
                    }
                })
            }

            didSetHue() {
                const rgb = this.colorUtil.hsvToRgb(this.state.hue, 1, 1);
                const color = `rgba(${rgb.r}, ${rgb.g}, ${rgb.b}, 1)`;
                const { sliderThumb } = this.view;
                sliderThumb.style.backgroundColor = color;
                this.drawGradient(color);
            }

            updateView() {
                const { colorPanel, paletteThumb, sliderThumb, dummyPalette, dummySlider, hexInput } = this.view;
                const rgb = this.colorUtil.hsvToRgb(this.state.hue, this.state.saturation, this.state.brightness);
                const rgbaColor = `rgba(${rgb.r}, ${rgb.g}, ${rgb.b}, 1)`;
                colorPanel.style.backgroundColor = rgbaColor;
                paletteThumb.style.backgroundColor = rgbaColor;

                // TODO: rgb to hex string
                hexInput.value = `#${Object.values(rgb).map(value => ("0" + parseInt(value).toString(16)).slice(-2)).join("")}`;

                // thumb point
                paletteThumb.style.left = `${dummyPalette.clientWidth * this.state.saturation - paletteThumb.clientWidth / 2}px`;
                paletteThumb.style.top = `${dummyPalette.clientHeight * (1 - this.state.brightness) - paletteThumb.clientHeight / 2}px`;
                sliderThumb.style.left = `${dummySlider.clientWidth * this.state.hue - sliderThumb.clientWidth / 2}px`;

                // delegate
                if(this.onColorChange) {
                    this.onColorChange(rgbaColor);
                }
            }
        }

        const picker = new Picker()
        picker.onColorChange = (color) => console.log(color)
<html>
<style>
    .hue-slider {
        position: absolute;
        /* width, centerY, to parent element */
        top: 50%;
        transform : translateY(-50%);
        width: 100%;
        height: 10px;
        background: linear-gradient(to right,
        hsl(0,100%,50%),
        hsl(60,100%,50%),
        hsl(120,100%,50%),
        hsl(180,100%,50%),
        hsl(240,100%,50%),
        hsl(300,100%,50%),
        hsl(360,100%,50%)
        );
        border-radius: 12px;
    }

    .thumb {
        position: absolute;
        top: 50%;
        left: -12px;
        /*  sliderの値が0の時thumbの中央がsliderの左端の真上に来るようにsize / 2ずらす */
        transform: translateY(-50%);
        width: 24px;
        height: 24px;
        border-radius: 15px;
        border: 2px solid white;
        cursor: pointer;
    }

    .color-panel-thumb {
        position: absolute;
        top: -12;
        left: -12px;
        width: 24px;
        height: 24px;
        border-radius: 15px;
        border: 2px solid white;
    }

    .hue-slider-container {
        position: relative;
        height: 50px;
        width: 90%;
        margin: auto;
        background-color: white;
    }

    .dummy-slider {
        position: relative;
        width: 100%;
        height: 100%;
        background-color: transparent;
    }

    .vstack {
        display: flex;
        flex-direction: column;
    }
    .hstack {
        display: flex;
        flex-direction: row;
        justify-content: space-between;
    }
    #color-panel {
        width: 100%;
        background-color: red;
        position: relative;
    }

    #color-panel > div {
        color: white;
        font-size: 30px;
        top: 50%;
        left: 50%;
        transform: translate(-50%,-50%);
        position:absolute;
        text-align: center;
    }

    .container {
        background-color: white;
        width: 800px;
        border: 1px solid gray;
    }

    .color-string-container {
        width: 95%;
        margin: auto;
        height: 50px;

    }

    .hex-string-container {
        width: 100%;
        position: relative;
    }

    .hex {
        left: 50%;
        transform: translate(-50%,-45%);
        position: absolute;
        width: 35px;
        background: #fff;
        font-size: 12px;
        text-align: center;
        color: #3c4043;
    }


    .border {
        border: 1px solid #dadce0;
        border-radius: 5px;
        height: 36px;
        margin: 5px auto 5px auto;
    }

    input {
        text-align: center;
        background-color: #fff;
        position: absolute;
        top: 50%;
        left: 50%;
        transform: translate(-50%,-50%);
        width: 78%;
        border: none;
        font-family: Roboto,Arial,sans-serif;
        font-size: 12px;
        letter-spacing: 0.15px;
        color: #3c4043;
        outline: none;
    }

    .color-palette {
        position: relative;
    }


    #dummyPalette {
        position: absolute;
        background-color: transparent;
        width: 100%;
        height: 100%;
        top: 0px;
        left: 0px;
    }

</style>
<body>
    <div class="vstack container">
        <div class="hstack">
            <div id="colorPanel"><div>color</div></div>
            <div class="color-palette">
                <div id="paletteThumb" class="color-panel-thumb"></div>
                <canvas id="canvas" width="600px" height="300px"></canvas>
                <div id="dummyPalette"></div>
            </div>
        </div>
        <div class="hue-slider-container">
            <div class="hue-slider"></div>
            <div id="sliderThumb" class="thumb"></div>
            <div id="dummySlider" class="dummy-slider"></div>
        </div>
        <div class="color-string-container">
            <div class="hex-string-container">
                <div class="hex">HEX</div>
                <input id="hex-input" value="#123456">
                <div class="border"></div>
            </div>
        </div>
    </div>

    <script> </script>
</body>
</html>
RxJSを使ってincremental searchする
<!DOCTYPE html>
<html lang="en">
<head>
    <meta charset="UTF-8">
    <meta name="viewport" content="width=device-width, initial-scale=1.0">
    <meta http-equiv="X-UA-Compatible" content="ie=edge">
    <title>RxJS Demo</title>
    <style>
        body { font-family: 'Arial'; background: white; text-align: center;}
        #container { width: 40%; min-width: 340px; display: inline-block;}
        .search-bar { padding: 10px; background-color: white; border-bottom: 1px solid lightgray; margin-bottom: 30px;}
        #textfield { width: 100%; height: 20px; font-size: 20px; border: 1px solid #DDDDDD; border-radius: 4px; color: #333333; padding: 5px;}
        ul { list-style-type: none; padding: 0px;  }
        li { background: white; padding: 30px 10px; margin-bottom: 10px; height: 50px; border-bottom: 1px solid lightgray; text-align: left;}
        a { color: blue; font-size: 20px; }
        p { color: #777777; padding-left: 5px; }
    </style>
</head>
<body>
    <div id="container">
        <h1>Serch GitHub Repository </h1>
        <div class="search-bar">
            <input id="textfield" placeholder="Find a repository..." type="text"></input>
        </div>
        <ul id="list"> </ul>
    </div>
<script src="https://unpkg.com/rxjs@6.5.2/bundles/rxjs.umd.min.js"></script>
<script src="./src/index.js"></script>
</body>
</html>
const { from, fromEvent } = rxjs;
const { map, distinctUntilChanged, throttleTime, switchMap } = rxjs.operators;

const searchRepository = (name) => {
    return fetch(`https://api.github.com/search/repositories?q=${name}`)
                  .then(response => response.json())
};

const AddRepositoryList = repository => {
    const li = document.createElement('li');
    const a = document.createElement('a');
    a.link = repository.url
    a.innerText = `${repository.owner.login}/${repository.name}`
    const p = document.createElement('p');
    p.innerText = `■ ${repository.name} ${repository.owner.login}`;
    li.appendChild(a);
    li.appendChild(p);
    document.getElementById('list').appendChild(li);
};

fromEvent(document.getElementById("textfield"), 'input')
   .pipe(
       map(e => e.target.value),
       throttleTime(300),
       distinctUntilChanged(),
       switchMap(repo => from(searchRepository(repo)))
   )
  .subscribe(response => {
      const repositories = response.items;
      repositories.forEach(repository => {
          AddRepositoryList(repository);
      });
   });
Swiftでタグを入力するUIを作ったやつ
タグを入力するViewを作った
以前に下のようなタグを入力する画面を作成したのですが、これもアウトプットしないと勿体ない系だと思ったので簡単にまとめます。
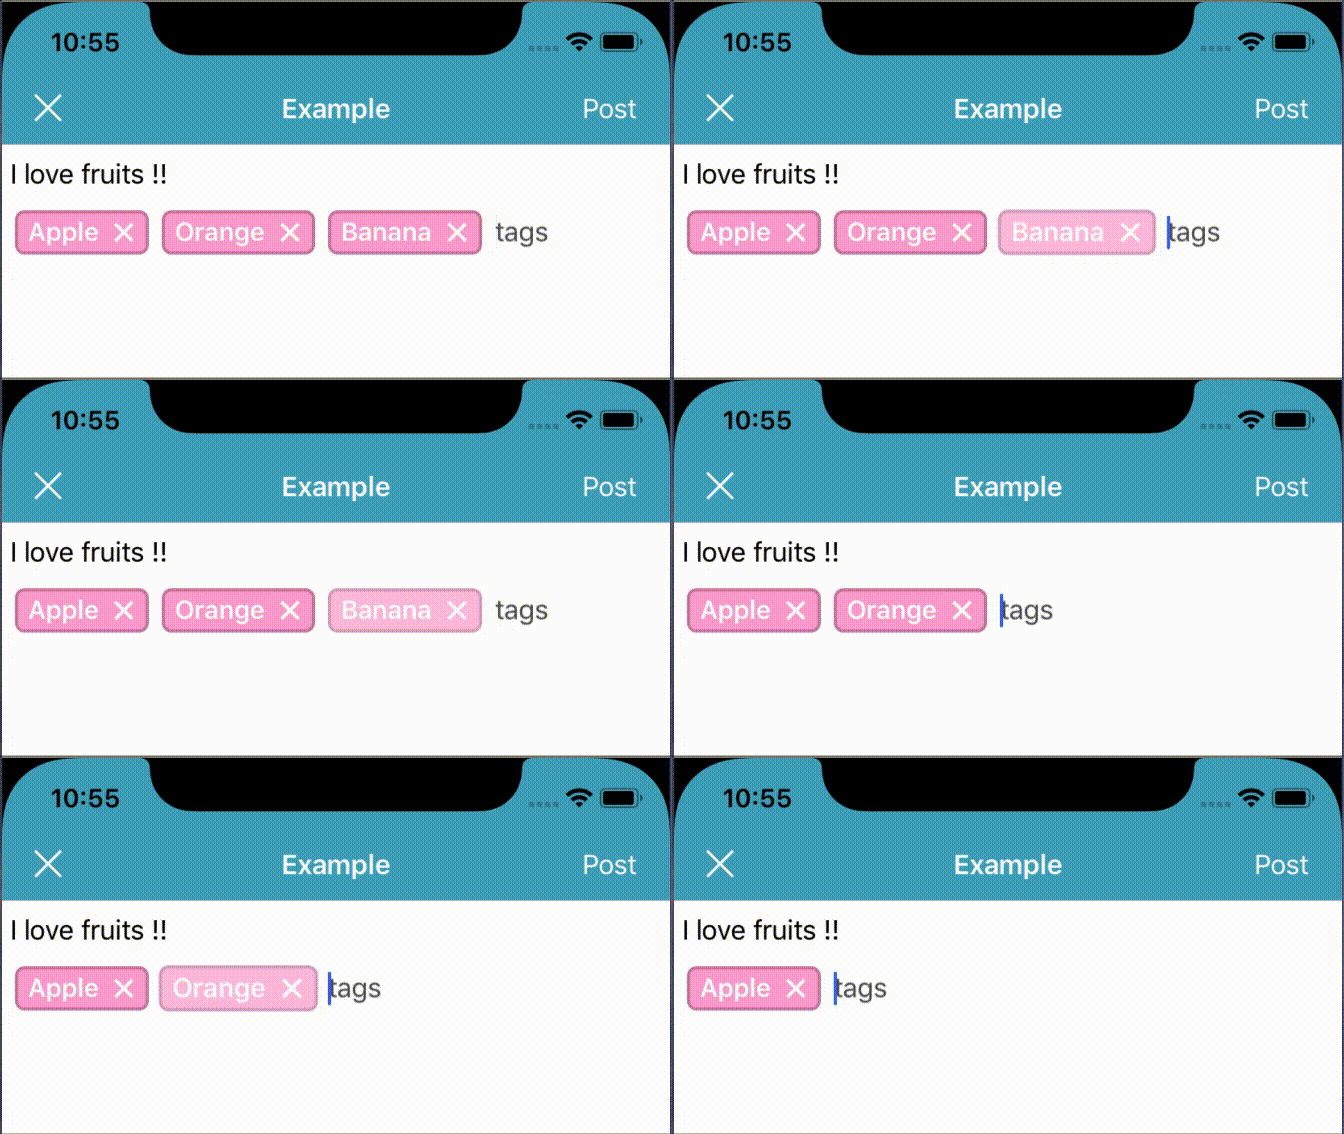
類似するUIを持つ具体的なアプリがすぐには思いつかないのですが、日記アプリやメモアプリなどタグを入力するUIは存在すると思います。 このような他のアプリで使えそうなコンポネントを公開する際は、どこまでカスタマイズ可能にし、どのようなインターフェースで公開するのか決めるのが凄く難しいです。 それでも悩んで公開しないよりは妥協して公開したほうがいいと思うのでまとめます。
使い方
普通に初期化して使えます。
let tagField = TagFieldView()
引数はこんな感じです。
    init(
        placeholderText: String = "tags",
        defaultTags: [String] = [],
        tagViewStyle: TagView.Style = .init()
        layout: TagLayoutView.Layout = .init(margin: Margin(x: 8, y: 4)),
        validator: TagValidator = DefaultTagValidator()
     )
placeholderTextと初期値のタグ(編集画面で使う場合は既にタグの入力がある)とタグの見た目とレイアウトオブジェクトとValidatorです。 Validatorは入力されたタグの検証をするためのものです。Defaultクラスはタグが重複しないように実装しています。
struct DefaultTagValidator: TagValidator {
    func validate(tag: String, tags: [String]) -> Bool {
        return !tags.contains(tag) && !tag.isEmpty
    }
}
例えば禁止ワードを排除したりDB内に存在しないものみの入力を受け付けるなどが想定できたので外出しにしました。 また編集画面など初期値でタグを入れる場合にも同様のvalidationが走ります(初期値とし重複したタグを入れられることに実装中に気付いた)
実装方針
Styleを外から決めて、UIイベントをクロージャーで公開するTagViewクラスやタグを並べるだけのTagLayoutViewクラスなど 軽めのクラスを作成し、それを親クラスのTagFeildが管理する実装にしました。 結果的にテキストの検証の部分や並べ替えの処理などがしっかり分けられていて良かったと思います。 またレイアウト用のクラスがLayoutオブジェクトを使って描画するようにしているため、タグの並べ方を例えば中央寄せにするなどといった拡張もしやすくなりました。(Layoutクラスにalignmentプロパティーを追加してLayoutクラスでそれを考慮して並べ替えるように追加する)
UI/UIX??
- Deleteキーを押すと一回目で直前の入力タグがハイライトされ二回目で削除されます。すでに選択されたタグがある場合はそれが削除されます。
- 選択時にはアニメーションと透明度を変えて分かるようにしてます。
感想
Textfieldの見た目、タグが選択された時の見た目、削除ボタンの見た目などはハードコードしています。 見た目のカスタマイズ性は中途半端に妥協しました。というか別にライブラリを作ったわけではない。
個人で使う分に作るのは簡単だったけど、公開するために色々考えるのはかなり時間がかかってしんどかったです。
SwiftでTooltipを書く
SwiftでTooltipを書いた
こうゆうツールチップを書きました。

こんな感じに書けます。 本当はもう少し描画周りのリファクタしたりカスタマズ性を持たせたりしたいが、そもそも自分が使わないのでこの辺でアウトプットします。
    private let toolTip = TooltipView(option: Option(
        fillColor: UIColor(0xf59542)
        attributeText: NSAttributedString(
            string: "Top: #f59542",
            attributes: [
                .foregroundColor: UIColor.white,
                .font: UIFont.systemFont(ofSize: 14),
            ]
        ),
        padding: UIEdgeInsets(top: 2, left: 4, bottom: 2, right: 4),
        arrowPosition: .bottom(normalizedPointX: 0.4)
    ))

ソース
nodebrewのメモ
brew install nodebrew
nodebrew -v
churabou@churabou ~> nodebrew install v8.9.4
Fetching: https://nodejs.org/dist/v8.9.4/node-v8.9.4-darwin-x64.tar.gz
Warning: Failed to create the file
Warning: /Users/churabou/.nodebrew/src/v8.9.4/node-v8.9.4-darwin-x64.tar.gz:
Warning: No such file or directory
srcを作る。
mkdir -p ~/.nodebrew/src
nodebrew use v8.9.4
簡単なGridLayoutを実装するためのLayoutクラス
はじめに
iOS開発をはじめて2年が経ち自分なりにUIKitでいろんなUIを作ってきました。そろそろアウトプットとしてgoogle検索で上位でてくる古い情報を上書きしようとと思っていた矢先、SwiftUIがでてきてしまい一気にモチベーションが下がってしまいました。ただなんかもったいなく感じたため1日10分程度をアウトプットの時間に割いていこうとおもいます。SwiftUIはあと1年遅くてもよかったかなぁ。
本題
UIKitでGridレイアウトを実装しようとするとUICollectionViewクラスを利用するのが一般的だと思います。 ただご存知の通りUICollectionViewを使う場合、UICollectionViewLayout, UICollectionViewDelegate, UICollectionViewDataSource、などのUICollectionViewのメソッドをいちいち呼ばなきゃいけないので結構面倒くさいです。 実際、昨年ぐらい(もっと前から?)宣言的に書くというのが、じわじわと広がってきて、今年になってSwiftUIもでてきてだいぶ宣言的にかけるようになりました。
CollectionViewはセルを再利用してくれるので、たくさんのデータを表示する際には使うのですが、場合によってはセルを再利用しなくてもいい場合があります。
そんなときにCollectionViewを使わずsubViewを並べてくれるレイアウトクラスをちょこっと作ってやるといいと思います。
再利用しないGridViewの例
使用例1
        gridView.backgroundColor = .white
        gridView.insets = .zero
        gridView.borderWidth = 5
        gridView.gridSize = 4

        let size = gridView.gridSize * gridView.gridSize
        let colors = (0..<size).map { UIColor(hue: CGFloat($0) / CGFloat(size), saturation: 0.85, brightness: 0.9, alpha: 1) }
        colors.forEach {
            let view = UIView()
            view.backgroundColor = $0
            gridView.addSubview(view)
        }
        gridView.layout.center(0).size(300) // オートレイアウトのExtension
カラーパレットとか


カレンダーとか

パスコードの数字入力画面とか

こうゆう画面をCollectionViewで実装しようとすると少し大袈裟というかコード量が増えちゃいますよね。
実装
final class GridLayoutView: UIView {
    var gridSize: Int = 4
    var borderWidth: CGFloat = 5
    var insets: UIEdgeInsets = .zero

    override func layoutSubviews() {
        super.layoutSubviews()

        let margin = borderWidth

        let width = (bounds.width - CGFloat(gridSize - 1) * margin - insets.left - insets.right) / CGFloat(gridSize)
        let height = (bounds.height - CGFloat(gridSize - 1) * margin - insets.top - insets.bottom) / CGFloat(gridSize)

        let startX: CGFloat = insets.left
        let startY: CGFloat = insets.top

        var x = startX
        var y = startY

        subviews.enumerated().forEach { index, view in
            view.frame.origin = CGPoint(x: x, y: y)
            view.frame.size = CGSize(width: width, height: height)

            x += width + margin
            if index % gridSize == gridSize - 1 {
                x = startX
                y += height + margin
            }
        }
    }
}
Tips
- 中央のマージンはborderWidthで指定します。
- 外側のマージンはinsetsで指定します。
- ボーダーカラーはbackgroundColorを指定すればかわります。
- subViewを自動で並べてくれるのでaddSubviewするだけです。
補足
等間隔にViewを配置するにはUIStackViewをよく使いますが、今回は使っていません。 内部でAutoLayoutを使用しているのと、純粋に座標計算したほうがコード量が少ないからです。
Storyboard派の皆さんはUIStackViewを使えば簡単にできるじゃないかと思うかもしれませんが 個人開発する上では圧倒的に時短かつ再利用可能です(コンポネントとして)
まとめ
ちょっとしたGridLayoutを実現するためのレイアウトクラスを作って使ってるよというはなし。 insert, delete, drag, reuseなどUICollectionViewのほうが優れている点が多い。
CoreAnimationのサンプル
雑にまとめます。 用語が一部正しくない場合がございます。
Pathに沿ってアニメーション
CAKeyframeAnimationにpositionで指定して、pathを指定してあげると パスに沿ってアニメーションします。
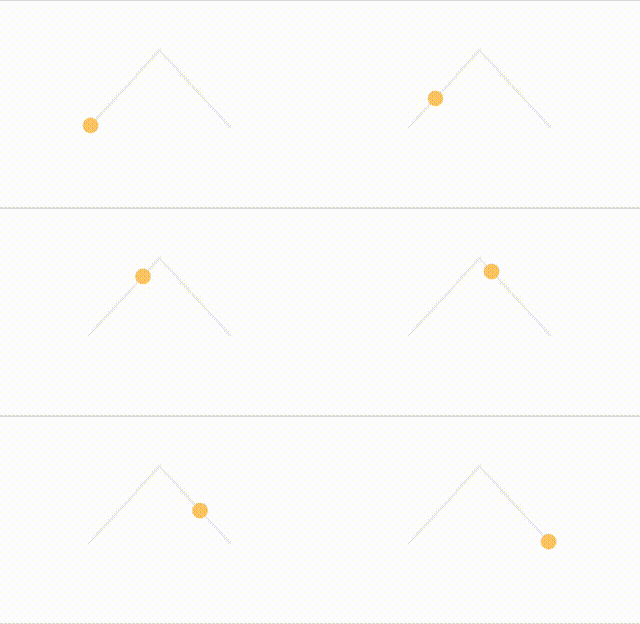
        let anim = CAKeyframeAnimation(keyPath: "position")
        anim.duration = 2
        anim.isRemovedOnCompletion = false
        anim.fillMode = .forwards
        anim.path = path.cgPath
        circleLayer.add(anim, forKey: nil)
https://gist.github.com/churabou/bcc3218df36018d345364eb5c18e537a#file-pathanimationview-swift
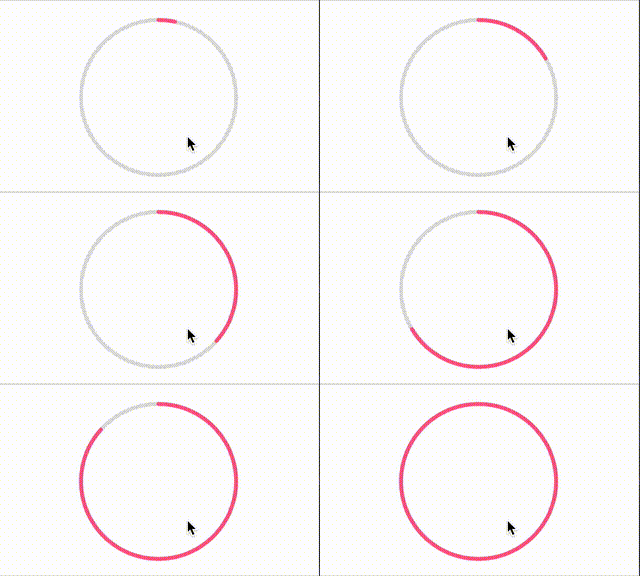
円形のチャートアニメーション
strokeEndを指定してあげるとPathのアニメーションをすることができます。
    let anim = CABasicAnimation(keyPath: "strokeEnd")
    anim.fromValue = 0
    anim.toValue = 1
    anim.duration = 1
    anim.isRemovedOnCompletion = false
    anim.fillMode = .forwards
    shapeLayer.add(anim, forKey: "key")
addArcメソッドで円を書く、そのパスをアニメーションさせます。 一つ下の階層に薄暗い背景のやつを表示することで円グラフのアニメーションができます。
     let path = UIBezierPath(
                    arcCenter: center,
                    radius: 100,
                    startAngle: -.pi / 2,
                    endAngle: .pi * 3 / 2,
                    clockwise: true
                )
https://gist.github.com/churabou/bcc3218df36018d345364eb5c18e537a
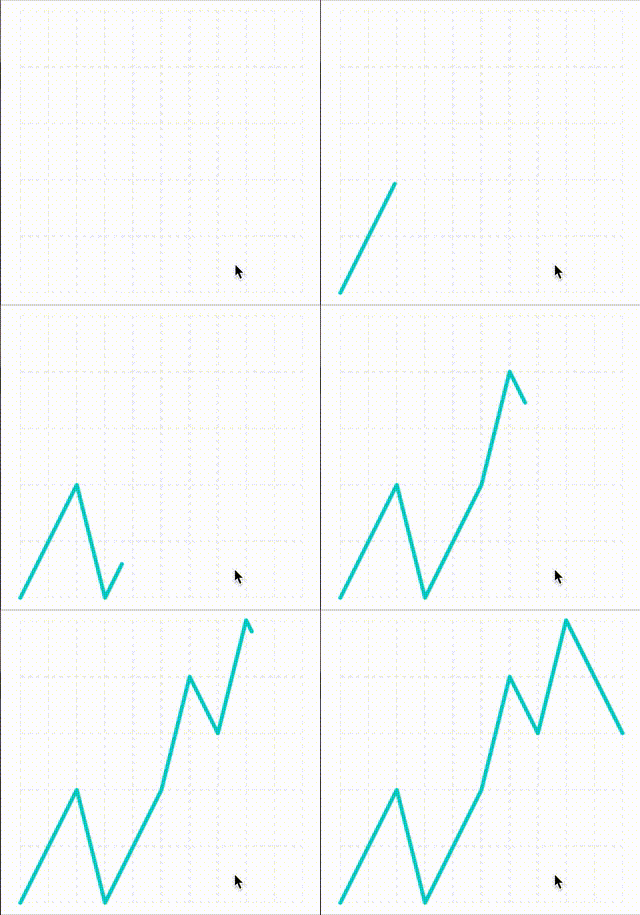
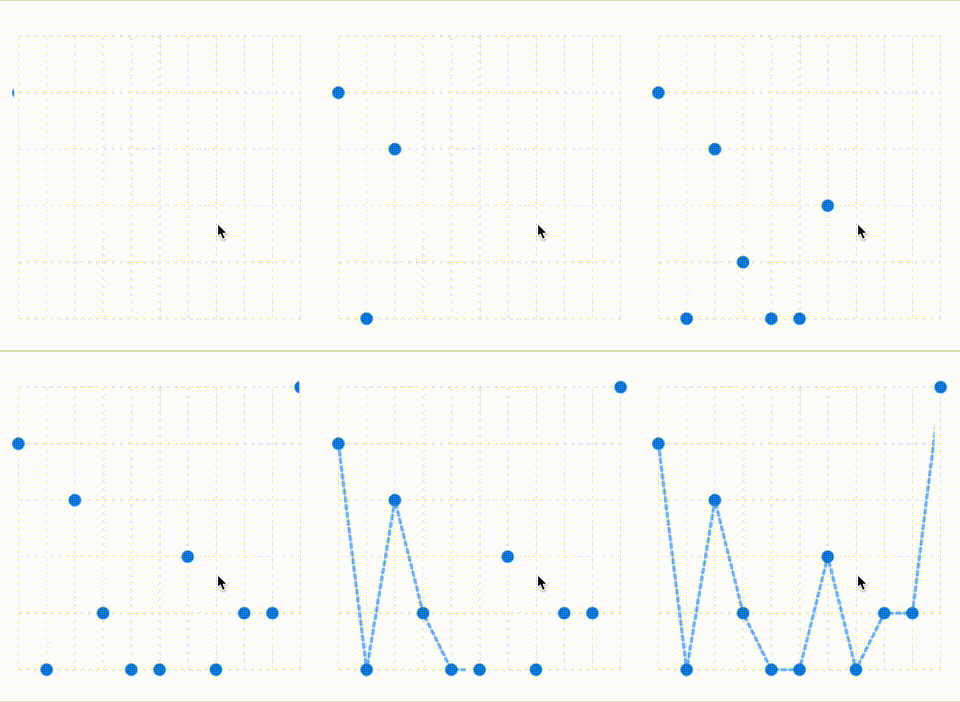
折れ線グラフの
点を決めてあげれば折れ線グラフのアニメーション
    let path = UIBezierPath()
    (0...10).forEach { i in
        let point = CGPoint(x: CGFloat.random(in 0...1), y: CGFloat.random(in 0...1))
        i == 0 ? path.move(to: point) : path.addLine(to: point)
    }
マスクアニメーション
CALayerをCAShapeLayerでmaskし、そのmaskのアニメーションをすることで、すでに描画してあるものを少しずつアニメーションしながら表示しています。
参考
チャートの色は適当に取ってきました。